Today, I will focus on Content Fragment templates. This post is in continuation of the previous post, where I talked about new Content Fragment feature introduced in AEM 6.2. In order to understand Content Fragment templates, it is important you understand the basic structure and capabilities of Content Fragment. Please refer my previous blog post for the same: https://experiencelabs.wordpress.com/2016/10/29/content-fragments-an-introduction/
AEM 6.2 ships with a standard Content Fragment template. However, for you to use Content Fragments for your project, you will need to create a Content Fragment template. Before we go deeper into defining our own template, we will first look at the template that ships with AEM 6.2. The template name is “Simple Fragment” and it is defined in libs under this path: /libs/settings/dam/cfm/templates
Let’s browse this location in CRXDE. You will see the following structure:
+ <template-name>
– jcr:primaryType
– jcr:title
– jcr:description
– initialAssociatedContent
– precreateElements
– version
+ elements
– jcr:primaryType
+ <element-name>
– jcr:primaryType
– jcr:title
– defaultContent
– initialContentType
– name
… + other element definitions
+ variations
– jcr:primaryType
+ <variation-name>
– jcr:primaryType
– jcr:title
– jcr:description
– name
… + other variation definitions
The key elements of the template are:
- Elements
A list of elements that would define the structure of the the fragment. This field is mandatory and needs to have at least one child node for the “Main” element. For each element, we can define the bootstrap content (the default text) as well as a the content type. AEM 6.2 allows three content types out of the box (html, plain text and markdown) - Variations(optional)
It defines the default variations for each Content Fragment. Please note, variations are defined at the Content Fragment level and this apply to all elements. - initialAssociatedContent (optional)
A array of paths to LightBox collections, that would be associated by default with each Content Fragment.
Now, we will go ahead and create a template of our own. As you know, /libs is reserved for items that ship with the product. Hence, you should never write anything in /libs. All custom Content Fragments should be either defined in /apps or /config. Let’s look at these two options more carefully.
Apps: here is the complete path /apps/settings/dam/cfm/templates, it doesn’t exist, you will need to create it. Create Content Fragment templates here for overlaying out-of-the-box template (Simple Fragment) and creating general purpose templates.
Config: here is the complete path /conf/global/settings/dam/cfm/templates, it doesn’t exist and you will need to create this as well. Create Content Fragment templates here for instance-wide customer-specific templates that may be configured to be unavailable. Use this location for defining folder specific templates.
For the purposes of this blogpost, we will create a template under /apps.
Step by Step Instructions:
- Prepare basic structure under /apps
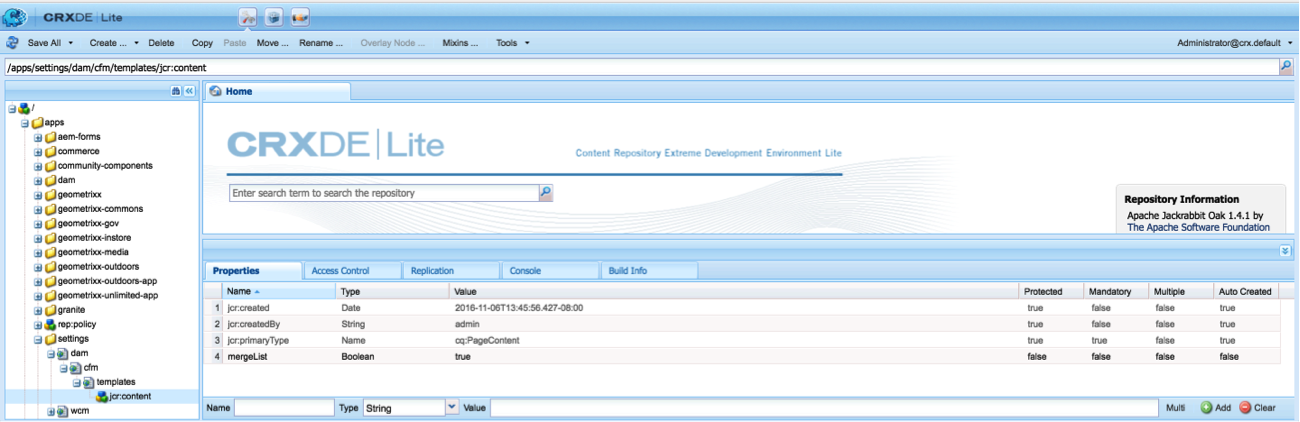
- Open up CRXDE lite, and browse to /apps/settings
- Create node of type cq:Page and name it dam
- Select the newly created dam node and create another node of type cq:Page and name it cfm
- Select newly created cfm node and create another node of type cq:Page and name it templates
- Select the newly created templates node and once more create node of type cq:PageContent and name it jcr:content.
- Now we need to specify that the templates in this location should be merged with those from /libs/settings/dam/cfm/templates. To do this, create a new boolean property under jcr:content named mergeList and set it’s value to true.
- Select “Save All” to save the changes we have made so far. Here is a snapshot of the CRXDE lite, after you complete these steps.
- Create a shell Content Fragment Template
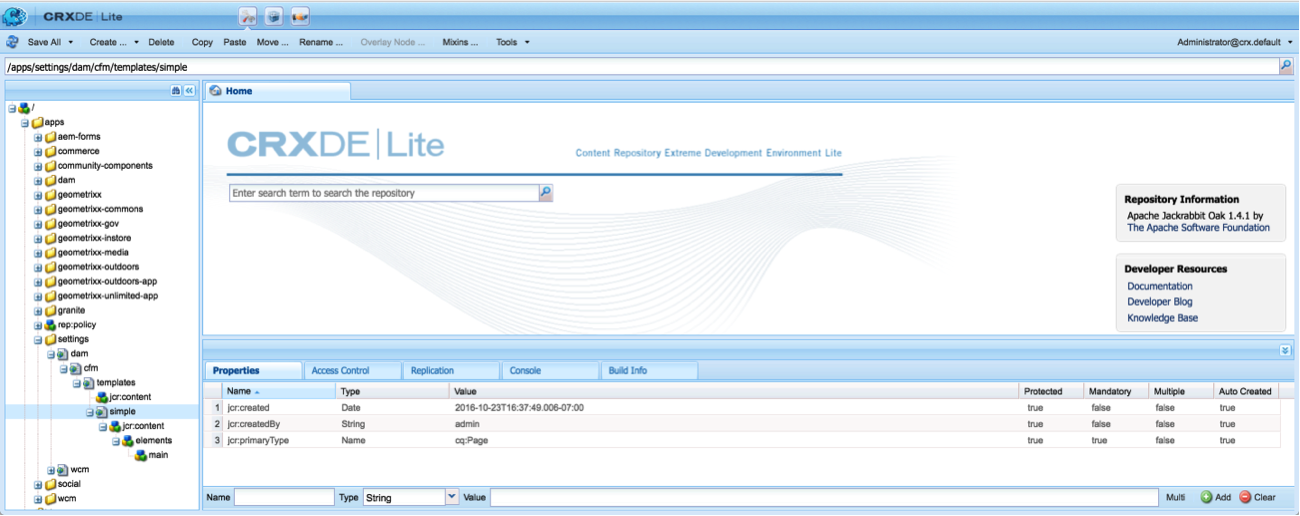
- Browse to /libs/settings/dam/cfm/templates and expand the node.
- Select “simple” node and Copy it.
- Browse again to /apps/settings/dam/cfm/templates.
- Select templates and Paste to create a copy of the “simple” node structure from /libs.
- Select “Save All” to save all the changes. Here is a snapshot of the CRXDE lite, after you complete these steps.
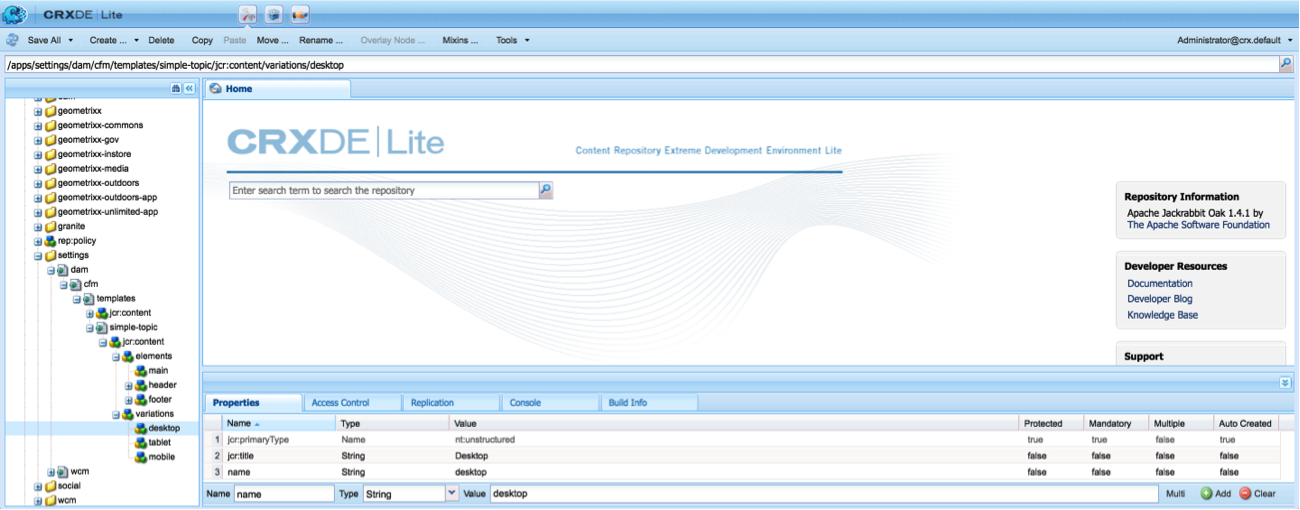
- Now we will modify the copied structure based on our needs. We will create three elements – Header, Main and Footer, and define three Variations – Desktop, Tablet and Mobile Phone.
- First, select “simple” node and rename it to “simple-topic”
- Next, select “jcr:content” under “simple”. Change the value of “jcr:description” to “A fragment, containing three elements and three variations” and “jcr:title” to “Simple Topic Fragment”
- Now, select elements and create two new elements – header and footer. To do so, create a new node and name it header. Add new properties “jcr:title” as “Header”, and “name” as “header”. Follow the same process to create “Footer” element.
- Lastly, select node “jcr:content” under node “simple” and create a new node of type nt:unstructured and name it variations.
- Now define all three variations – desktop, tablet and mobile, by creating a new node for each one of them of type nt:unstructured. Also set at least two properties, jcr:title and name.
- Select “Save All” to save all the changes. Here is a snapshot of the CRXDE lite, after you complete these steps.
We have now successfully defined a new template called “Simple Topic Template”. Let’s test and use it in creating a new Content Fragment.
To create a new content fragment using the newly created template,
- Browse to AEM Assets (DAM): http://localhost:4502/assets.html/content/dam
- Click on “Create” and select “Content Fragment” to create a new Content Fragment
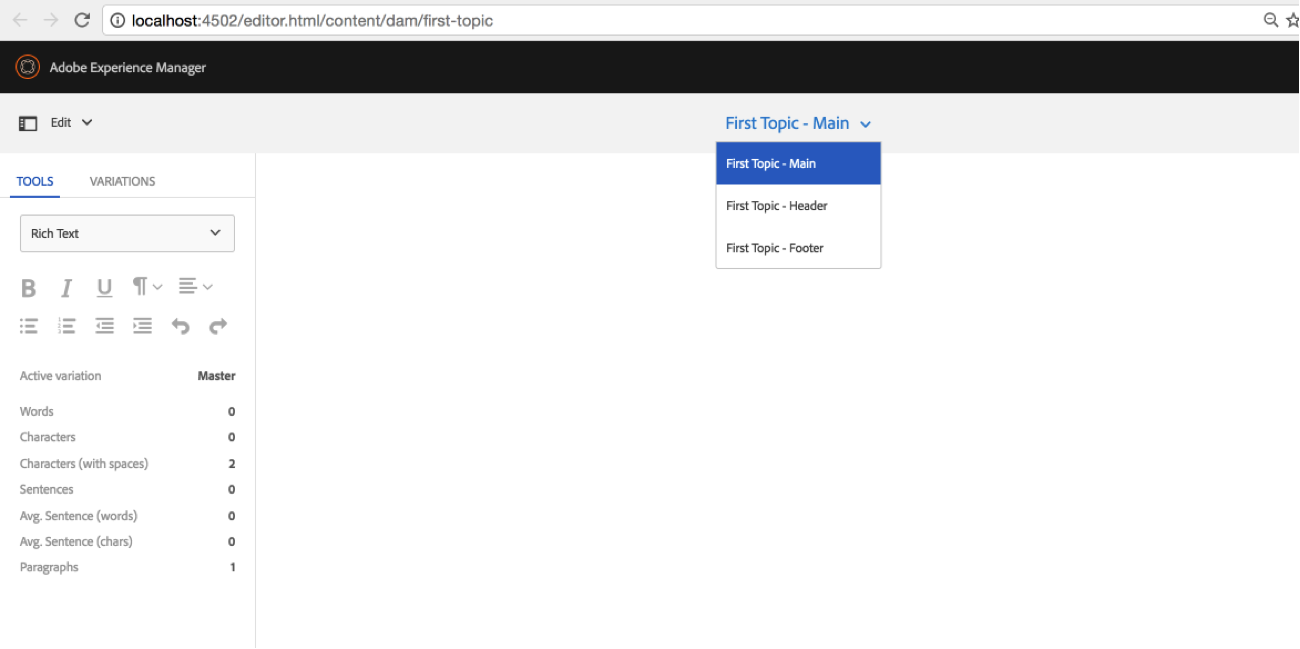
- In the “New Content Fragment” wizard, you shall see two templates. Select the newly created “Simple Topic Fragment” and click next. Provide a name for the new template say first topic and click “Create”. Next choose “Open”.

- We can now check and see that the newly created first topic template has three elements called – main, header and footer. We can select each one of these options to author these three sections separately.
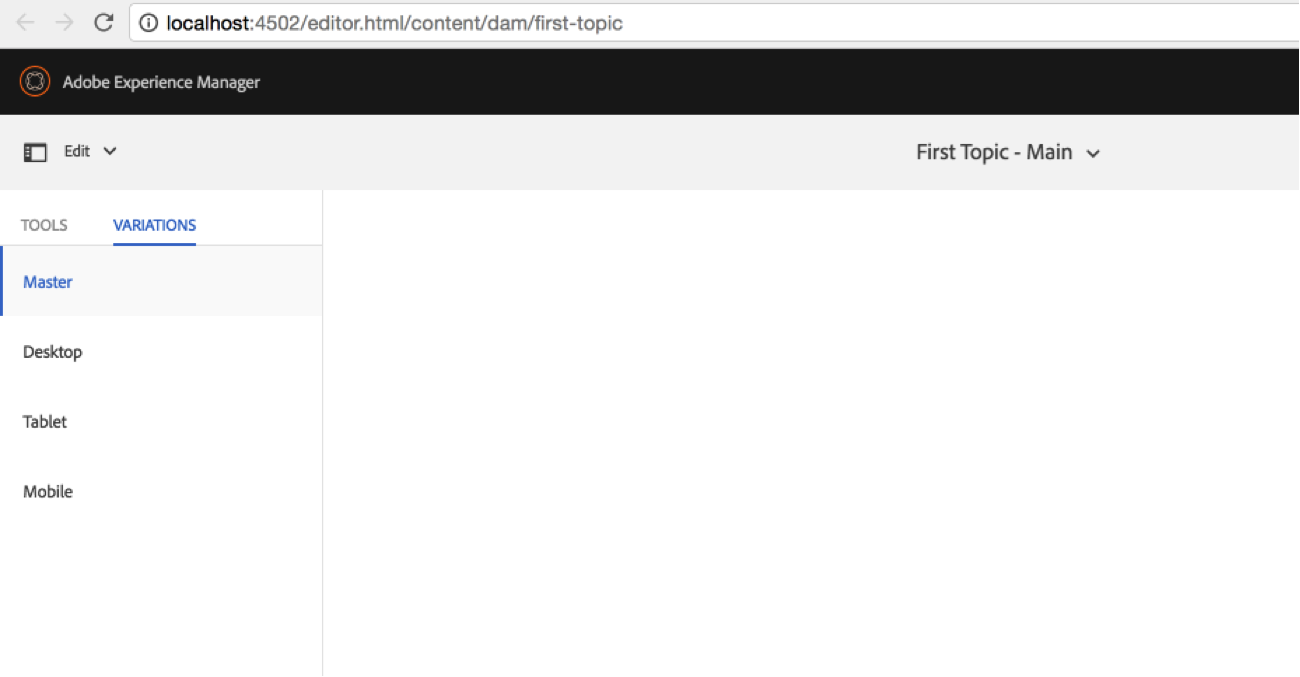
- Next, click on Variations and see that all the three default variations (desktop, tablet and mobile) that we defined in the template are also available.
We have successfully created and used a content fragment template.
Do share your thoughts/comments/feedback for the post.
